
Welcome, fellow home bakers and dessert lovers! Today, I invite you to embark on a culinary journey with one of the most deliciously irresistible treats you can ever make in your kitchen: the Peanut Butter Passion Bars. These bars blend the creamy, nutty richness of peanut butter with the luscious sweetness of semi-sweet chocolate and the wholesome texture of rolled oats. The result? A mouth-watering symphony of flavors and textures that will captivate your senses from the very first bite.
In this comprehensive guide, I will share my personal experience, detailed step-by-step instructions, expert tips, ingredient insights, storage advice, and frequently asked questions — everything you need to master this classic dessert bar. Whether you’re baking for a family gathering, potluck, or simply treating yourself, these bars promise to impress.
Why Peanut Butter Passion Bars Are an Ultimate Dessert Favorite
The combination of peanut butter and chocolate has long been a beloved pairing worldwide. But what makes Peanut Butter Passion Bars stand out is the perfect balance of richness and texture. The peanut butter adds creamy depth while the sweetened condensed milk binds the ingredients with its smooth, sweet touch, and the rolled oats give the bars a satisfying chewiness and a hint of wholesome goodness. This blend makes these bars not only indulgent but also comforting and satisfying.
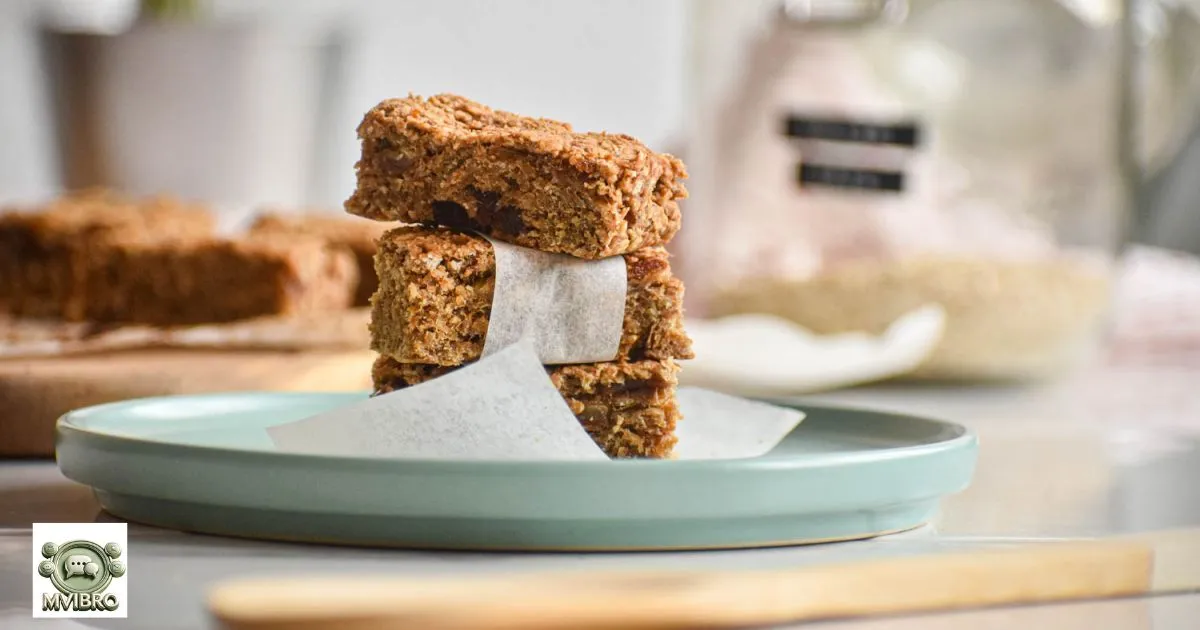
When I first baked these bars, I was immediately taken by their aroma — the warm, toasty scent of baked oats mingling with the enticing notes of peanut butter and melted chocolate. The golden-brown crust on top is the cherry on the cake, adding a pleasant crunch to every bite.
Essential Ingredients for Peanut Butter Passion Bars
Before diving into the recipe, let’s explore the key ingredients that make this treat so exceptional. Each one plays a crucial role, and knowing their function can elevate your baking game.
| Ingredient | Purpose | Notes |
| Peanut Butter (3/4 cup) | Provides creamy, nutty flavor and moisture | Use natural or creamy for best texture |
| Semi-Sweet Chocolate Chips (1 cup) | Adds sweetness and chocolate richness | Choose quality chocolate for a smoother melt |
| Flour (1 cup) | Structure and body to bars | All-purpose flour works well; can substitute gluten-free flour |
| Sweetened Condensed Milk (1 can, 14 oz) | Acts as a binder and sweetener | Gives creamy texture and caramel undertones |
| Rolled Oats (2 cups) | Adds texture and chewiness | Use old-fashioned oats for best results |
| Brown Sugar (1 cup) | Sweetness and moisture retention | Light or dark brown sugar can be used |
| Salt (1/2 teaspoon) | Balances sweetness | Enhances overall flavor |
| Baking Soda (1/2 teaspoon) | Leavens slightly, giving lightness | Must be fresh for proper reaction |
| Butter (3/4 cup, room temperature) | Adds richness and tenderness | Use unsalted butter for control over salt |
| Vanilla Extract (2 teaspoons) | Deepens flavor complexity | Use pure vanilla extract for best aroma |
Step-By-Step Preparation: How to Make Peanut Butter Passion Bars
Step 1: Preparing Your Kitchen and Tools
Before you start, preheat your oven to 350°F (175°C). Grease or line a 9×13-inch baking pan with parchment paper for easy removal and cleanup. Gather all your ingredients at room temperature for even mixing.
Step 2: Making the Crumbly Base Mixture
In a large mixing bowl, combine the flour, rolled oats, brown sugar, salt, and baking soda. These dry ingredients form the structure of your bars and the sweet undertone.
Next, add the soft butter in small pieces. Use a pastry cutter, fork, or your fingertips to cut the butter into the dry ingredients until the mixture resembles coarse crumbs. This process, known as “butter cutting,” ensures that the butter coats the flour particles, creating a tender, flaky texture when baked.
Pro tip: Don’t overwork the mixture; stop as soon as it looks crumbly with pea-sized butter pieces visible.
Step 3: Creating the Base Layer
Press half of this crumbly mixture firmly into the prepared baking pan to form an even, solid base. Use the back of a spoon or your fingers to compact it well — this will provide a sturdy foundation to support the peanut butter and chocolate layers.
Step 4: Preparing the Peanut Butter Filling
In a separate bowl, mix the peanut butter with the sweetened condensed milk and vanilla extract. Stir gently until smooth and well combined. The sweetened condensed milk will add creaminess and a luscious, sticky texture that holds the bars together.
Step 5: Spreading the Peanut Butter Mixture
Spread this creamy peanut butter layer evenly over the crumbly base you just pressed into the pan. Use a spatula to smooth it out, ensuring an even layer so every bite gets the perfect balance.
Step 6: Adding the Chocolate Chips
Generously sprinkle the semi-sweet chocolate chips over the peanut butter mixture. Don’t skimp — this layer is where the chocolatey magic happens! The chips will soften and melt slightly during baking, creating delightful pockets of chocolate throughout the bars.
Step 7: Topping with the Remaining Crumble
Crumble the remaining half of the oat-flour mixture over the chocolate layer. This final topping will bake into a golden, crunchy crust, contrasting beautifully with the creamy peanut butter and melted chocolate beneath.
Step 8: Baking to Perfection
Place your pan in the preheated oven and bake for 25 to 30 minutes, or until the top layer turns a gorgeous golden brown. Keep an eye on the edges to avoid over-baking. Once done, remove from the oven and set the pan on a cooling rack.
Step 9: Cooling and Serving
Allow the bars to cool completely in the pan — this is key for clean, easy cutting. Once cooled, slice into 24 squares or rectangles. Serve immediately or store as per the tips below.
Expert Baking Tips to Perfect Your Peanut Butter Passion Bars
- Butter Temperature: Always use butter that is soft but not melted. This helps you achieve the crumbly texture for the base.
- Oats Selection: Old-fashioned rolled oats are preferable over quick oats because they provide more texture and bite.
- Even Spreading: Use a flexible silicone spatula for smoothing layers evenly without tearing the base.
- Check Doneness: The bars are ready when the edges are golden and the top crust feels firm to touch.
- Cutting Cleanly: Use a sharp knife, warmed with hot water and dried, for neat slices.
Variations to Customize Your Bars
- Crunchy Peanut Butter: Swap creamy peanut butter for crunchy to add extra texture and nutty bursts.
- Nut-Free Version: Use sunflower seed butter or almond butter as an allergy-friendly substitute.
- Add Nuts: Fold in chopped peanuts or walnuts into the peanut butter layer for a delightful crunch.
- White Chocolate Chips: Replace semi-sweet chips with white chocolate for a sweeter, creamier flavor.
- Add Spices: Sprinkle cinnamon or a pinch of cayenne pepper in the base mixture for warmth or subtle heat.
Storage and Shelf Life
- Room Temperature: Keep bars in an airtight container for up to 2 days.
- Refrigeration: Store leftovers in the fridge for up to 4 days to maintain freshness.
- Freezing: Wrap bars individually in plastic wrap and place in a freezer-safe container. Freeze for up to 3 months. Thaw at room temperature before serving.
Frequently Asked Questions (FAQs)
Can I use crunchy peanut butter instead of creamy?
Yes! Crunchy peanut butter adds delightful texture and nutty bites to the bars, enhancing the overall experience.
Are these bars gluten-free?
Not as written, since they contain all-purpose flour and rolled oats which may have gluten traces. For gluten-free, substitute with gluten-free flour and certified gluten-free oats.
Can I make these bars vegan or dairy-free?
You can try vegan butter and use a plant-based condensed milk substitute, but expect some differences in texture and flavor.
How do I prevent the bars from becoming too soggy?
Make sure to bake them until the top crust is golden and firm, and allow complete cooling before cutting.
Can I add protein powder for an energy boost?
Yes, substitute a portion of the flour with unflavored protein powder to make the bars more nutrient-dense.
Nutritional Overview (Approximate per bar)
- Calories: 180-220
- Protein: 4g
- Fat: 10g (mostly from peanut butter and butter)
- Carbohydrates: 22g
- Sugars: 14g
- Fiber: 2g
Note: Nutritional values vary with ingredient brands and substitutions.
The Joy of Sharing Peanut Butter Passion Bars
These bars are perfect for parties, lunchboxes, bake sales, or as a comforting snack with your afternoon tea. Their portability and shelf stability make them ideal for any occasion. Plus, the homemade touch shows love and care, making every bite more meaningful.
Final Thoughts
From the very first step of mixing the crumbly base to the aromatic scent filling your kitchen during baking, making Peanut Butter Passion Bars is a rewarding experience. The layers of creamy peanut butter, rich chocolate, and buttery oats combine into a truly heavenly treat.
So, don’t wait! Gather your ingredients, roll up your sleeves, and create these bars that bring smiles and satisfied sighs to every table.
Related Recipes You Might Enjoy
- No-Bake Peanut Butter Oat Bars
- Chocolate Chip Oatmeal Cookies
- Homemade Nut Butter Energy Bites
- Classic Chocolate Brownies with a Peanut Butter Swirl

Hi! I’m Ethan Matthews, the admin of mvibro.com, dedicated to bringing you the best responses and comebacks to navigate conversations with style and confidence.